Boooking loot

Tuesday, 21 February 2012

Pump up your music sound clarity!


==>Improve Your Music Player Audio Quality<==

We listen the music simply in music player and want to more good quality music player,for this and use many music player like VLC, Window Media, Real Player and etc for sound quality....

Here i will tell you how to enhance the good sound quality with the existing player :
It can enhances your music listening experience by improving the sound quality of music files.

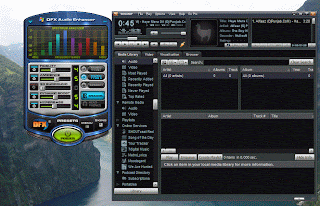
This is a music player plugins DFX.
Step 1. For downlaod it Click Here!.

Step2. Now install it .

Step 3. Now turn on the music player who's DFX plugin you install like : Window Media Player

Step 4. You can see the DFX automatically start itself when you start the music player .


Step 5. Now change the DFX dynamic audio option
  1. Fidelity
  2. Ambience
  3. 3D Surround
  4. Dynamic Boost
  5. Hyper-bass
You can change it from  0-5 , according to your sound taste!
Full Working Of TC- Turbo C in Window 7 or Vista


In my older POST i told you how can you simply use TC- Turbo C in full screen! But its not fully functional means the TC will give an error when you run heavy or Graphics program.

Here i will tell you how to use TC fully featured in Window 7 or Vista:

Step 1 : Download and Install the DOSBOX.!

Step 2: Copy the TC - Turbo C folder in the C: Drive directly.

Step 3 : Open the DOSBOX from your desktop or from the START, you get the window like :


Step 4 :  Now Write these set of commands:

=>  mount d c:\tc
mount is used to create an virtual drive path.

=> d:


=>cd bin 

=> tc

Now you get the window like this:

now press " alt+Enter" for full screen .

Now use the TC in full screen :)


Now you can run the heavy and graphics program in this without having any error from the TC.

But Never Compile the program from " Ctrl + F9 " in dosbox its used for exit .
Use the nav bar . " Run " for run or compile the program!

**Note- Dont forget to change the directory in d:\bin for TC

Recover your Permanently Deleted or Corrupted Data


=>> Recover Deleted Data <<=
As we use many removal device to store our data like "Pen Drive, Hard Disk, " .
Sometime it's corrupted due to failure or accidentally we delete the important data from removal device, then we have to face many problem due to the data lose.

This data is difficult to recover.

Here I will Discuss about the Toll By Which U can Easily Recover Your Data From Memory Card, Pen Drive, Hard Disk etc...


Step 2. After Download, Install it and Launch the software.  Press "Next"

Step 3. Now Choose the File Format which you want to recover for e.g. Image,Song,Document etc .
Step 4. After Choosing file format, You can choose various option for location where you stored your file.
For e.g. If the Data is Deleted or corrupted from Pen Drive then you have to choose Pen Drive Location, Then Click on "Next"

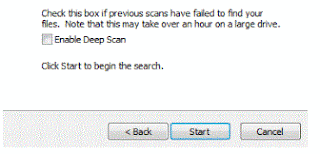
Step 5. Now  Select "Enable Deep Scan" Option and Click on "Start".

Step 6. Then, This Tool process for file searching, and after some time it show the deleted file.

Step 7. Now It show many deleted file , You have to choose the file which you want to recover , After selecting Click on "Recover".

Step 8. Now give the path where you want to restore file.

Step 9. Its Done :) ! If you face problem then see the Demonstration example given below.

Demonstration  :-
Lets take an example , I have a folder "Data123" in which i store my picture, accidentally i deleted the folder name as "Data123" From My "C:/temp" Drive now see the step how i recover my Data123 Folder "Picture's".

Now My data is in image format so i choose picture,
Now My Picture was stored in C://temp/Data123 so i chose the folder path, From "In a specific option",
Now After Choosing the Path Click "Next" and after this
Check the "Enable Deep Scan" Option and then click on "Start" For Start the recovering of Data.

Now , it take some time for the processing to search deleted file.
After Processing, you have to choose files which you want to recover back, Select File by checking it and click on "Recover".

After this you have to give the path where u want to store the recover file. Like "here i recover files on the same folder".

My 4 file which i click for recover was succesfully recoverd on the same folder.


Now Its Your Time To Get Back Your Data :)

Hide Your Data As A Image

Today we need some privacy but now a day's every one is too much intelligent, we use many software like Folder locker and many more for hiding our data but other person easily recognized these type of software .

So here I'll tell you how to hide your data in the form of "Image" , by using this Simple method you can easily Hide your private data , which is shown as simple Image file .


Here I take a E.g. to show the procedure for hiding data .

1. Create a folder in C: directory as folder name "a" ( C:\a )
2. Copy any imaginary image on the same folder e.g. "example.jpg"
3. All the Data files, if file are more then 1 then add these file into a single RAR file , if file is single then you don't need RAR file


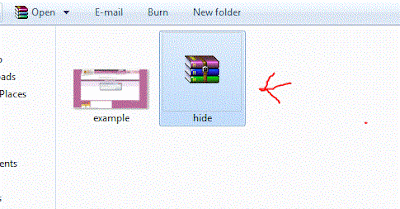
Now rename this rar File as "hide.rar",Now delete all the file escape "example.jpg" and  "hide.rar"


After doing this open Command line interface Through Start   (Start>cmd)


After Command line interface(cmd) opened , Then change directory for Folder "a" by command
"cd C:/a" press Enter

Now type command "copy /b example.jpg + hide.rar" press Enter
Now open folder "a" (C:/a) you found Same Image but With Increase In Size

Delete the "hide.rar" file from the folder and Right Click on image -> Open With , Choose Win Rar For open the image now you find same file as "hide.rar".


Now After This When the data is access then, Again chose your default Image View from "Open with" Option.

This Trick is also Known As "Stenography".

Thursday, 16 February 2012

How To Update Facebook Status In Blue Text By Dailyhackingtips | Latest FaceBook Magic Tricks


use the following Code:
@[1: ]@@[1:[0:1: Type Here]]
This code is more efficient as it doesn’t require Profile Id instead it automatically points to your own Facebook profile.
Type Here is ur status 

How to Make Your PDF Files Speak To You By Dailyhackingtips | Shortcuts To Make Your pdf files 'Speak'


Hey friends,
Got bored of reading large PDF files, tutorials, documets, etc. Would you like to know if someone reads it for you & that too free of cost. I know you guys are eager to know that, so here it is.

1. First of all Install Adobe Reader , if you haven’t already.

2. Ok So first you go to View>Read out Loud> Activate Read Out Loud.


3. After you have done that just do this.


Now it will read it to you out loud in the Default Microsoft Sam voice.

That's it 

Please Share The Article On Facebook And Other Social Networks To Help Us Little.

How To Hack Windows Administrator Password In Safe Mode


Have you ever tried using someone’s computer when they said you couldn’t? And you cant log in because they have a password? Below is the step by step procedure where you can log in to machine
Just in case anyone is confused:
 
Your Acount Name – the account name you wish to have
Victim Account Name – the account name of which you wish to change the password.
 
Step 1:
Restart the computer, and when it boots back up tap the f8 key a few times to go to a menu that asks about safe mode.
 
Step 2:
Select safe mode with Command Prompt. It should load into safe mode allowing you to use CMD.
 
Step 3:
Now what you need to do is type this command:
net user YourAccountName localgroup administrators /add
NOTE: What this does is is create the account in the administrators group. =)
 
Step 4:
now type
shutdown -r -t 1
NOTE: this restarts the computer. Then log in with your newly created account.
 
ALTERNATE PROCESS:
Another way to do this is to do the same thing as earlier and boot into safe mode with command prompt.
Type this:
net user VictimAccountName *
You should see this output
Please Enter a new password:
Please Confirm new Password:
To add your account to the admin panel type this: net localgroup administrator “username” /add
This takes the account specified and changes the password to what you want.
Be careful as entering the password doesn’t show anything.
Please drop a comment if this doesn’t works. Leave me some Feedback. =)